
Creating Your Classes (Groups)
For a teacher, organization based on classes, subjects or periods is key! Groups make it easy for the teacher to distribute notes, assignments and quizzes, and provide a way for students to communicate and collaborate. You can make a separate Group for each class or period. There is no limit to the number of Groups you can create, and there is no limit for the number of Groups a student can join.

Create a Group by following the steps below:
- Select the “Plus” icon next to “Groups” on the left side panel of your Edmodo Homepage.
- Select "Create."
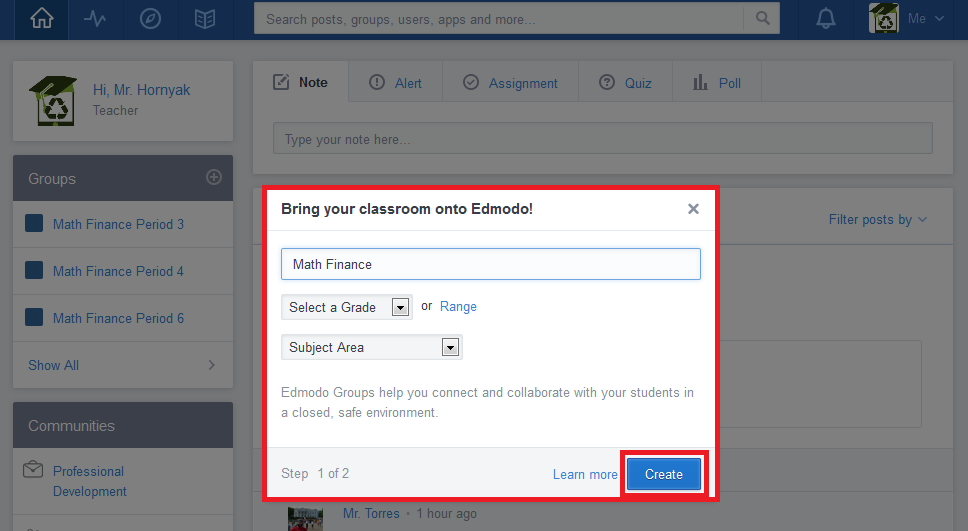
- Enter a Group name, select the correct grade or range of grades, subject area and subject in the pop-up box that appears in Step 1.
- Click "Create" to move on to Step 2.
- Enter your "Expected Group Size" and a description of your group. There is no limit to how many group members can join, expected Group Size just lets you track how close to having all your members join you are. This can be changed at any time.
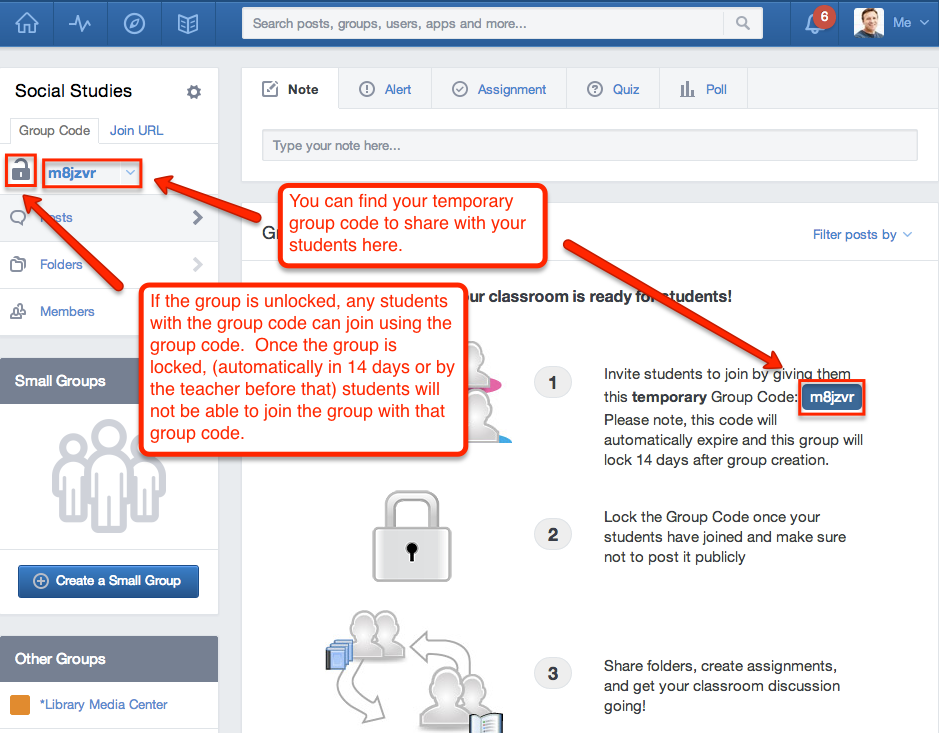
- Click "Finish" to create the group and you will be taken to the Group page which will display the temporary 6-digit Group code on the communication stream as well as the left side panel. This is the Group code that you will need to give your students so they can join your Group. The Group code will become invalid when the Group is automatically locked after 14 days by our system for safety purposes or if the teacher locks the Group before that time.
Note: Editing your group moderation settings can be done once the group has been created. Also note, using unique Group names is helpful when you want to archive a Group from one year and create a new Group the next year, for example: Period 1 2013 and Period 1 2014. You cannot have two Groups named Period 1, even if one of them is archived.
This page has been created using information found at: support.edmodo.com
